Saturday, December 31, 2011

Race Car Themed Room!

Hello Everyone,

Part of my New Years Resolutions is to work more diligently on my blog. As some of you

may have noticed, I have not been posting for several months. I found a teaching position

in the nick of time and shortly after I found out I was expecting! Although they are both 

huge blessings these two things put me in a state of high anxiety and consumed the

majority of my time the last few months. (My pregnancy is High Risk and my class has

been extremely challenging to say the least.)However, I am excited to find a new rhythm

and a stock pile of great posts to launch 2012 with! So I figured, why not start with a

big project first!

 With the baby coming, and discovering that we would need to switch out the rooms to

accommodate a nursery I went to work on making the room transition exciting and

remarkable for Aiden. This way he would feel special and not feel pushed out.


It has not been a secret that my son has been almost obsessed with cars/vehicles of

ANY kind so, I had my theme, that was easy… Cars! The two challenges were budget

and the fact that we are in a rental.The color of the room was white, and very dingy…

luckily our landlords offered to pay for paint if they pre-approved the colors. Naturally,

we had to go with neutrals. However, this is not too much of a compromise since neutrals

work with many color pallets.

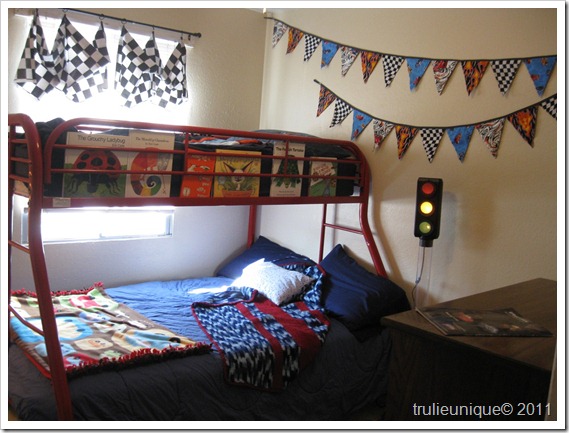
Race Car Room, pennant banner, checker flag valance,

The pennant banner material was  purchased and started for his Birthday in September

but I just finished them this week. I had extra material left over and made the Checker-

flag Valance. He got the Stop-light bank for Christmas. (Knowing our budget was

tight, we picked things that would work for Christmas and his room transition.) He

LOVES it! His Aunt made the red and blue afghan to match and the car blanket

at the foot was from his room before. The bedding and bed was already red and blue so

to save money we kept the same color scheme.

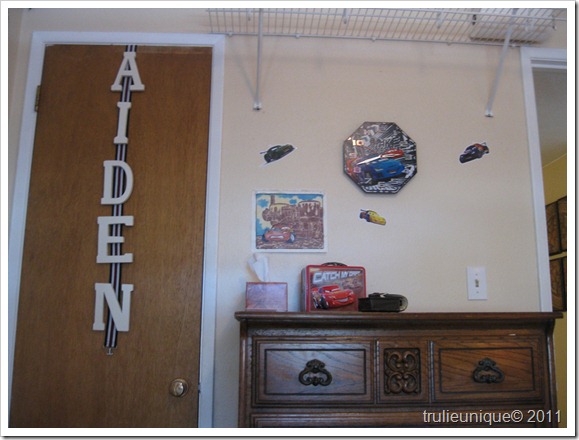
race car room, cars room, wall plaque, name plate  

Aiden was extremely excited to use his “letters” in his new room. These were previously

used in his nursery and had yellow and green ribbon around the edges. I removed the

ribbon and found this old elastic belt in my odds and ends craft box that worked perfectly

as a backdrop to glue the letters to! the colors and design worked perfectly I think, as it

looks like a road! He has been fascinated with clocks since he was 18 mo. or so. Getting a

Cars themed clock was a no-brainer when it came to Christmas this year! The wall

clings came with the clock so homerun on a free and removable room décor helper!

The picture you see was colored by Aiden’s cousin as a gift. It added a great personal

touch to the room.

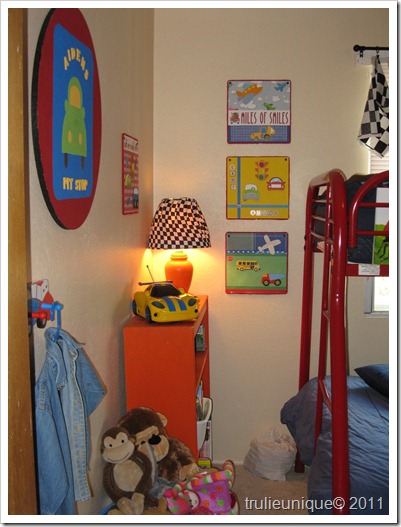
race car room, race car lamp shade,


The red and blue wall plaque was a very inexpensive project made over the summer.

I considered  re-painting the lamp and the orange book case but I felt it added a bit

of “umph” and went quite well with the cars theme. Not to mention it kept the budget

pretty low. I had left over fabric from the pennant banner to recover the lamp shade

that helped to tie it all in. He loved the “new lamp” so much he literally squealed in

delight! I used his own toy cars to help drive the theme such as the remote control race

car on top of the bookcase and I reused the wall pictures that I had in his old room

to complete this room. They were cheaply made from a combination of cork tiles,

scrapbook paper, and pre-painted wooden vehicles. Several months ago I also picked up

the cars coat hanger on clearance for less than 5 bucks!


Tips to consider when on a budget…

*Repurpose, repurpose, repurpose.. ALL that you can.

*Choose a theme that you love!

*Go with solids on sheet sets so that in does not interfere with theme. (it is easier and

less expensive to recover throw pillows and throw blankets than it is to change an

entire bedding set!)

*Pick colors that can be used again as they grow or are easily added to, to make different.

* Check your scraps before shopping for new, you never know what can suddenly be a

great inspiration!

* mix it up, do not commit to a brand (such as Disney only) when committing to a brand

you limit your options on budget and in my opinion is too confining in style. For example,

I sprinkled Disney Pixar Cars throughout, but as he grows and his taste changes, I could

switch those items with Chevy, for example, with little added cost to me.

Things I would like to add:

*recover pillows with scrap material from pennant banner.

Best Blogger Tips Pin It
Thursday, October 6, 2011

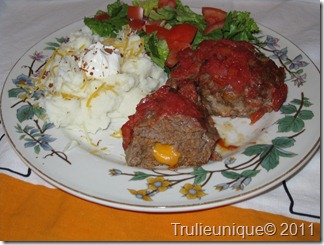
My Momma’s mini-meatloaves with a unique twist!


This was a huge favorite of our

entire family growing up! 

My mom liked making them because they were

faster than traditional meatloaves. I like them because

I can mix them ahead of time, freeze them and then

have individual servings already made up!

meatloaf, cheesy meatloaf, mini meatloaf,


Mini-meatloaves

There is not an exact recipe to follow so I

will list the ingredients and try to describe

the texture and look you are going for.

Hamburger meat

minced onions (I prefer fresh)

squirt of Ketchup

squirt of mustard

handful or more of crushed saltine crackers

(or butter crackers are good too)

pepper to taste

garlic powder

onion powder

1-2 eggs (for binding)

(I do not add salt before cooking)

1 can crushed tomatoes (for tops)

Optional add in’s (not traditional for my mom):

grated carrots, bell peppers, real bacon bits,

breakfast sausage,

large hunks of cheddar cheese (for the inside)

mini meatloaves


Mix ingredients in a bowl, I do not like using my hands

for this part but if you do more power to you! The mixture

should be semi firm and yet very moist and holds its shape.

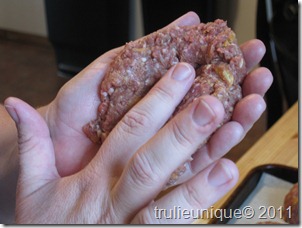
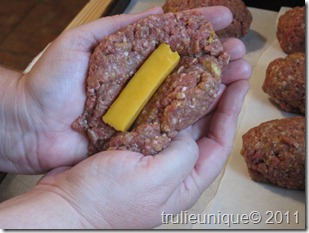
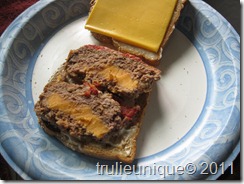
For my twist add cheddar inserts;

press indentation in bottom long ways.


IMG_1413

Then place cheddar hunk in center and wrap sides back

around to completely cover cheese.

IMG_1415

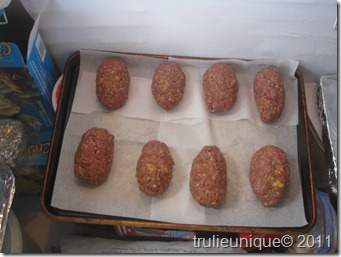
If preparing for a later day, place on wax paper lined

cookie sheet for a flash freeze. Then place entire tray

in freezer until frozen.

IMG_1418

Then place in freezer type bag for future use!

When you are ready to bake:

Pour 1 can of stewed tomatoes over the tops.

( this is a crucial step even if you do not like cooked

tomatoes. We usually picked the tomatoes off when

eating, but we have found that making them

with out results in much less flavor and moisture)


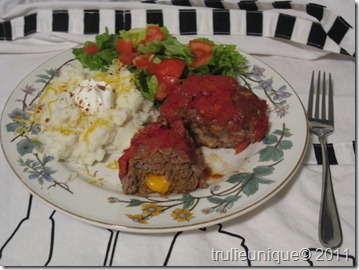
017

Place in a 350 degree oven for about on hour

or until center is cooked through.

019

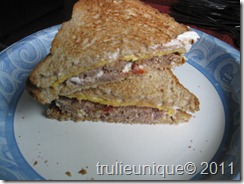
On Day two, (my Dad’s favorite):  the cold meatloaf

sandwich! Which I love too! I like to place mayo on toasted wheat

bread and add a slice of American cheese. YUM!

027028


Best Blogger Tips Pin It
Baby girl baby gifts

Simple but cute!

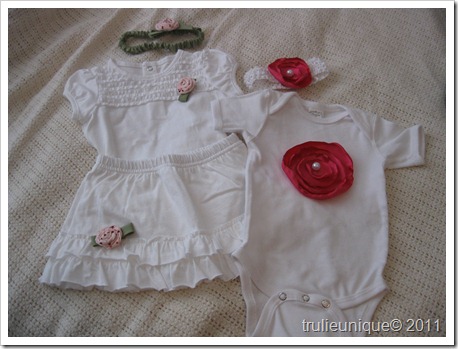
One of my oldest and dearest friends

recently had a beautiful baby girl and

I wanted to make something very pink and

unique!

baby gifts, head bands, flower headbands,

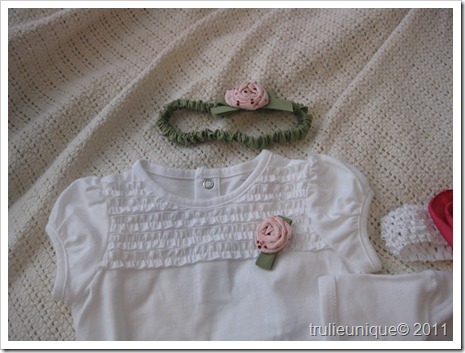
The green headband was made from extra

bias tape I had. and the pink poka-dot flowers

were made from scrap fabric too!

head bands for baby

The flowers are all removable for easy washing too!

Happy Birthday Mindy!


Best Blogger Tips Pin It
Sunday, September 4, 2011

Shower Curtain Up-cycle

Shower Me with Savings!

Just in case you haven’t noticed yet,  

I am not one to spend my money carelessly.

If I can find a way to make it for less I will.

When I went to buy a shower curtain I was thrown

into classic sticker shock! There was no way I was

going to pay 30 dollars for a curtain that hangs near

the facilities, and where my pigpen of a boy cleans up

after a hard day of play. Nope, not me, and not $30.00.

After many shopping trips and coupon clipping I

gave up an went the route of DIY!

shower curtain, redo shower curtain, inexpensive shower curtain

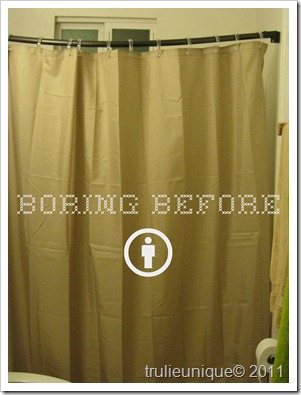
Boring Hotel-Style Basic Shower Curtain

$10.00

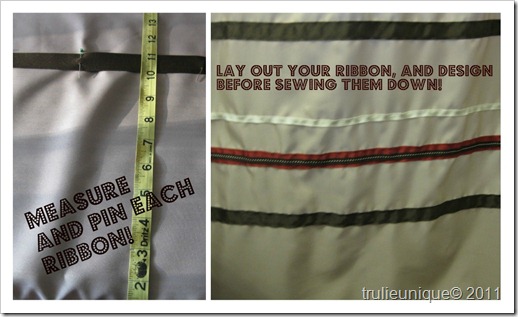
measure and pin, shower curtain custom

Now, I have learned the hard way that for some projects, pinning

is a MUST and for others, over-pinning is IMPERATIVE!

To my dismay, the curtain was not straight to begin with

and the polyester was very slick to sew on. It took a lot of patience.

I had to pin and measure each ribbon and sew them one at a time.

Then, begin the process over, measuring from the last  stripes

placement.

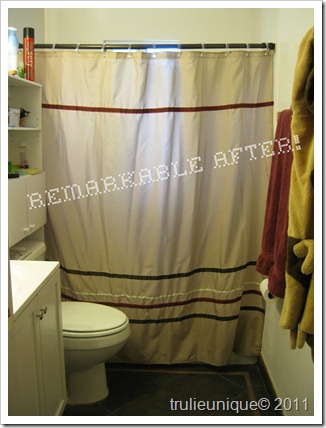
Trendy Ribbon: $4.00

remarkable after

Uniquely designed, custom shower curtain

for only $14.00 = Awesomeness!

A 50% Savings…

I leave you triumphant!

Linked up: *Before&After Party   *Made by You Mondays

Just Something I whipped up Monday

Making the world cuter Monday   Market yourself Monday

Motivate Me Monday  Craft 

The sasse life Best Blogger Tips Pin It

Friday, September 2, 2011

Birthday Brunch

My favorite meal is breakfast!

I like to start my day right. This brunch was for my husband’s

birthday but it was also because we had my nice, her husband,

and her two adorable kids over for the weekend…..

A perfect excuse for a brunch!

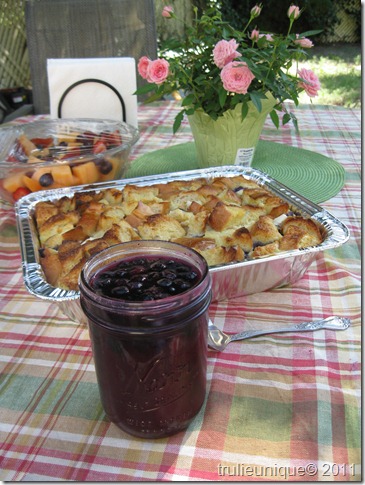
blueberry breakfast, breakfast casserole, french toast


I have decided to start a new category called “Because of YOU!”

I love blogging and I love being creative and doing my

own thing. I also believe in giving credit where credit is due.

There are many things in blog-world that simply are

great as is and I want to try them without any

changes, but then I also want to share the experience

on my blog as my own.

So this is my first “Because of YOU!” post

Thank you to

Real Mom Kitchen

and her

Overnight Blueberry French Toast w/ Blueberry Syrup 

(Real Mom Kitchen is a new fave of mine. Take some time

to check her blog out she is amazing!)

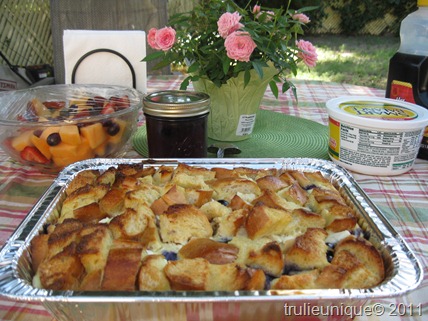
I have to say this was an amazing breakfast dish.

I was afraid that it may come off as too sweet but it

was perfect, even the syrup was not that sicky-sweet, that

some syrups turn out to be.

French Toast:
12 slices bread, cut into cubes (french or Texas toast work well)
1 (8-ounce) package cream cheese, cut in cubes
1 cup blueberries (fresh or frozen)
12 large eggs   1/3 cup maple syrup
2 cups milk (I use 1 cup milk and 1 cup cream)
  1. Arrange 1/2 of the bread cubes in a greased 9 x 13 pan.
  2. Sprinkle cream cheese cubes and blueberries evenly over the bread cubes.
  3. Top with remaining bread cubes.
  4. Mix together eggs, milk, and syrup.
  5. Pour over bread cubes and cover pan with foil. Let chill in refrigerator overnight.
  6. Bake covered with foil at 350 degrees for 30 minutes.
  7. Remove the foil and bake for another 30 minutes or until fluffy and golden.
  8. Top with sauce. Serves 8.

blueberry syrup, brunch 

When I made the syrup I made a double batch to

add to my Very Vanilla Cake layered thank you gifts

featured here. What I did not tell you is that as we

finished the Very Vanilla cake off we poured the left over

syrup on the cake too. Wow what a great combo!

Blueberry Syrup:

1 cup sugar

1 cup water

2 Tablespoons cornstarch

1 cup blueberries (fresh or frozen)

1 Tablespoon butter

Cook water, sugar, and cornstarch until thickened.

Stir in blueberries and simmer for 10 minutes.

Add butter and stir until melted.

Not only was this simple and fast but costs about an 8th

of what you would pay in the store!

IMG_1433   

(sorry for the poor photo quality it was about 3 a.m.)

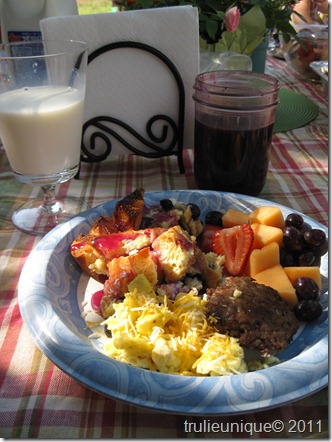
I paired this scrumptious casserole with sausage patties,

Scrambles eggs and a simple fruit salad! Add a little

Mother Nature and a simple table cloth and you

feel like you are at a bed and breakfast in the country!

brunch


Isn’t it funny how small touches like a table cloth or

eating outside makes life wonderful!

Linked up:

Be different Act Normal    day and age design  six sisters stuff

*Iheartnaptime- Sundae Scoop

Best Blogger Tips Pin It
Thursday, September 1, 2011

A Day of Cooking, several weeks of meals.


I have been cooking like crazy!

This is what I have been up too.

freezer meals, time saving meals,

My biggest problem when trying to cook at home

as opposed to eating out is trying to remember to take

meat out of the freezer, or even deciding what I

want to take out of the freezer! So when my

mother in law told be about cooking ahead and freezing

the pre-cooked meat, I couldn’t wait to try it.

freezer meals, cooking time savers

I started with hamburger and I was so excited that

I not only found it on sale but I grabbed a managers

special and got my meat for .99 per lb. WOW!

(One draw back though it was only 80% lean and I nearly

always buy 90% for health. But right now w/my husband

in school and me still looking for employment,

I dare not pass it up.)

*In a skillet scramble your hamburger and add your basic

seasonings that lends itself to any hamburger recipe.

Mine is Garlic powder, onion powder, pepper, and a little

beef bouillon powder for flavor.Now let the meat cool slightly. 


*heart health tip: if you wait to add salt to when you

serve food you tend to add less and it is more gratifying.

Salt also tends to make your hamburger shrink.


ziploc vacuum bags

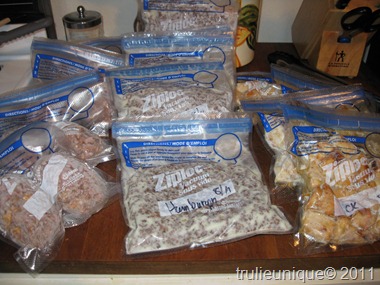
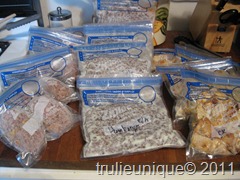
Then I placed the cooked meat in meal-sized proportions

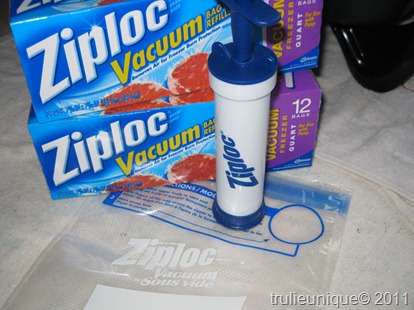
in these ultra cool Ziploc Freezer Vacuum bags! 

(BTWI am not getting paid to say this.. I wish,

but I am not.Just thought it was a cool item

to share, and many people do not know about them.)

You can find them next to all the other freezer bags

they come in both gallon and quart size. The first

time you purchase them you have to get the box

with the pump included,but it is cleanable

and reusable.

Once you seal your food you use the

hand pump to suck the air out of the bag.

This is what prevents freezer-burn!

My son LOVES this tool and it made a great fun

and productive mommy/me project!

ziplock

   While my hamburger was cooking, I mixed up mini-meat-loafs

to freeze ahead as well.

(Of which I will have a separate post about.)

Once my hamburger was put away and cleaned up.

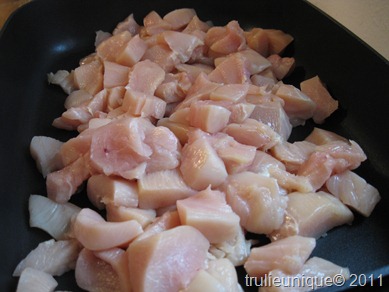
I started on my chicken. It too was on sale so
I made a day of it!

You really follow the same basic steps except omit the
beef bouillon.

 chicken freezer meals

I was hesitant about freezing my meals

this way at first; thinking it may be dry or taste like

leftovers but to my surprise this is not the case!

To re-heat: simply place meat in small skillet

or sauce pan with about 1-2 tbs.water and heat to

desired temperature! Add other spices or ingredients

to customize the meal.

I use the hamburger for meals such as spaghetti,

sloppy joes, tacos, burritos, SOS, biscuits and gravy,

stroganoff, taco salad, nachos,casseroles ect.

For the chicken I use it on top of salads, make tacos,

alfredo,soups,chicken salad, and casseroles!

freezer meals

In one evening I was able to complete dinner for

the night and save about 30min. prep time for

13 additional meals! Which saved me

6 and 1/2 future hours of cooking! Fwweeew!


* additional tips: *

When grilling chicken throw on a few more breasts,

cube them and place in freezer bags for a quick 

“grilled chicken salad”for later! 

When making cookie dough, double the recipe,roll extra

dough, place on cookie sheets and freeze for a couple of hours.

Once frozen,pop them off and place in freezer bags for baking later!


Linked up at:


Best Blogger Tips Pin It

Wednesday, August 31, 2011

A VERY Vanilla Birthday Cake!

Yummy Vanilla!

I asked my Spouse what kind of cake

he wanted for his birthday and this is what

he said… “ I want a dense, moist, vanilla

cake.” When I probed further he indicated,

a vanilla filling with vanilla frosting. So,

I said, “you want a wedding cake!…

You got it!”

I tease about his love of vanilla but vanilla

can be rich and VERY satisfying.

vanilla cake, moist cake, dense cake, homemade cake, vanilla powder

I fist sought out the cake recipe. I chose

this one by haute apple pie

but adapted it to my husbands vanilla desires.

Very Vanilla Yogurt Cake:

4 cups all purpose flour

2 1/2 cups sugar

2 tsp. baking powder

1/2 tsp. baking soda

1/2 tsp. salt

2 cups Vanilla yogurt

2/3 cup Vegetable oil

4 eggs

4 tsp. vanilla extract

2 tsp. vanilla powder

Yields: 2- 9inch rounds

preheat oven to 350 degrees. Grease and flour

bottom and sides thoroughly. Mix together dry

ingredients and set aside. In a separate bowl,

mix together yogurt, oil, eggs, and vanilla extract.

Finally, pour yogurt mixture with the dry

ingredients and stir until just combined.

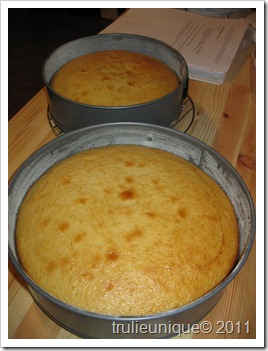
Pour half the batter into each of your pans

and bake for about 40 minutes or until Golden

and toothpick comes out clean. Let cake cool for

5-10 minutes then flip cake out on to wire

rack.

vanilla cakes

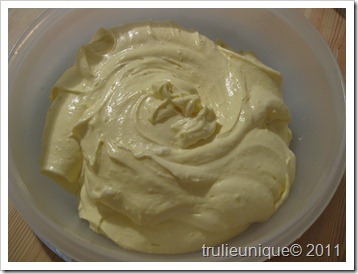
Now for the filling! I made a Bavarian Cream!

It was adapted from this Food.com recipe.

Very Vanilla Bavarian Cream

8 oz. softened cream cheese

2 small boxes of instant pudding mix

2tsp. vanilla powder

1/2 cup milk

1/2 cup whipping cream

12oz. Cool Whip

Mix together cream cheese, dry pudding mix,

and vanilla powder until smooth on medium

speed. Then add milk and cream, and beat

on medium for two minutes or until smooth.

Fold in cool whip.

Bavarian Cream filling, vanilla filling, cake filling,

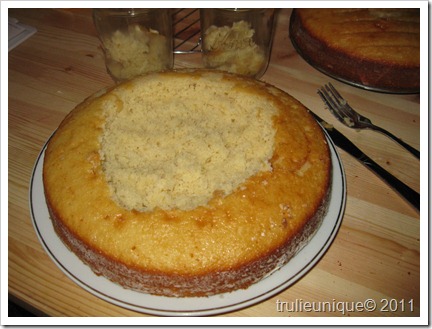
Now that my cakes are cooled I am ready to

add my cream center! (my layers were not the

same size and worried that I wouldn’t be able to

properly “fill” my cake. so I decided to take a little

from the top/bottom of each cake)

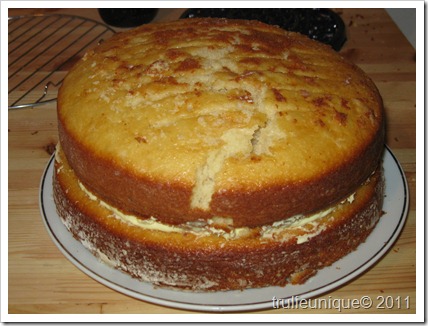
The picture explains…

vanilla cakes, yogurt cakes 

I then filled and stacked them realizing

the removal of some of the cake was not only

not necessary, but weakened my top cake!

It turned out that the two cakes were not

that different in size!

vanilla layered cake

Since it was like 3:00 a.m. I decided to wrap my

cake tightly with plastic wrap and refrigerate

overnight to firm it up for decorating.

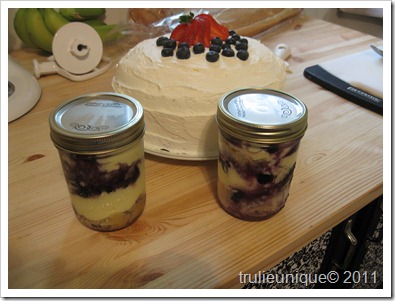
(Also not wanting to waste the removed cake, and

coincidently needing a nice thank you gift, I dug

out two clean mason jars. I layered the bits of

cake alternately with the extra Bavarian cream

and added layers of a homemade blueberry syrup

that I made for a Sunday Brunch. They were a huge

hit! and made a small mistake into a blessing! )

I felt quite resourceful!

vanilla cake in jars

Okay on to day two:

The Perfect Vanilla Butter Cream Frosting!  

Adapted from foodnetwork.com

3 cups powdered sugar

1 cup butter room temperature

1 tsp. vanilla powder

2tbs. whipping cream

In standing mixer, fitted with a whisk, mix

together sugar, vanilla powder and butter. Mix on

low speed until well blended and then increase speed

to medium and beat for another 3 minutes. Finally,

add cream and continue to beat on medium speed

for another minute or so. Check for consistency,

and add more cream slowly,

if needed for spread-ability!

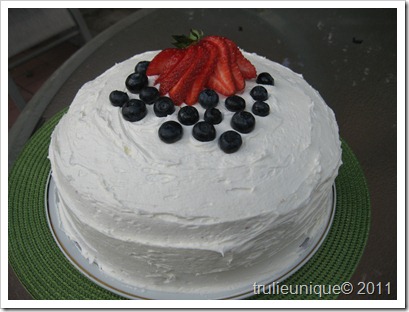
very vanilla cake

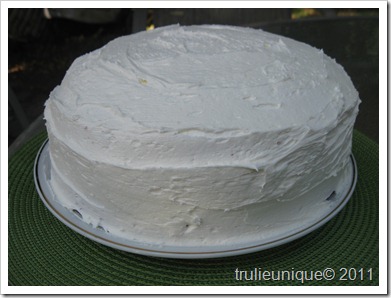
I was tempted to leave it this beautiful white

snowball but the artist in me could not

leave this blank pallet for long. I went

with simple berries to keep the illusion

of simplicity.

The outcome:

“received two thumbs up from MR. Vanilla, little vanilla

licked his plate clean and our guests loved it too! By the way this

was my first successful homemade cake and only second frosting! " 

very vanilla cake

Linked up at: Pinching Penny Party  Blue Cricket Design  Creations By Kara

Sew Much Ado  Gingersnapcrafts *Tip Junkie  733  Transformation Thursdays

Somewhat simple  Show off your stuff  HOH  Thrifty Thursday  Under 100

thesasselife  Freestylefriday  Simply Sweet Home   Show and Tell Friday

 Blissful and Domestic  Social Saturday   the shabby creek cottage

Whipper Berry  504   Sassy Sites    Be different Act Normal  six sisters stuff 

 *Iheartnaptime- Sundae Scoop   Tuesday Talent show

Best Blogger Tips Pin It

Wednesday, August 24, 2011

Waffles made easy

Happy National Waffle Day!

Who knew?

waffles, freezer waffles

I am a long time lover of the canyon like nooks and crannies

of this great and traditional breakfast treat but I had no idea

it had it’s own holiday! YEA! What an awesome excuse to have

my favorite!

Okay, so… I have had our waffle iron for longer than I can

remember and sadly is has been a neglected appliance!

Now, I have a couple of slightly embarrassing secrets to admit.…

First, I have been prone to buying premade/toaster ready waffles.

Yep, there, it’s out there, I said it, I am ashamed, but I said it.

I won’t be telling you exactly how many boxes a week I

would buy, but it is staggering when I think about

the amount of money I threw away…. for wafer-thin

less than tasty store bought waffles.

But Folks I am here to change my ways!

Well, some of my ways! My second secret is when I do

make them at home, I use Krusteaz pancake/waffle mix.

waffles,

I know, I know! There are tons of great recipes out there

but honestly… I like the –eaz of Krusteaz, of dumping

unmeasured amounts of mix with an eyeballed amount of water

to create perfect pancakes and waffles EVERY time!

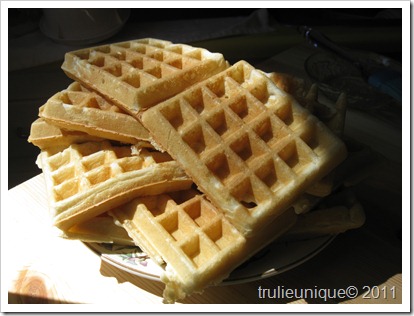
stack of waffles

(Just so you know I am not getting anything from Krusteaz

for this post I just happen to be a fan!)

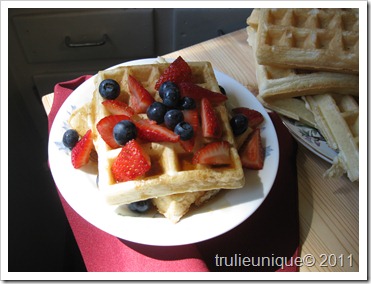
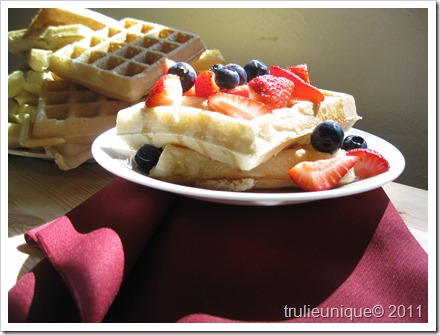
This picture tells no lies! It speaks for itself: Perfection!

Not only are waffles wonderful to eat and easy to make

they freeze quite well and take no extra effort to do so.

(I say this as I hang my head in shame thinking of all

the times I put boxes upon boxes of waffles in my cart.)

See, when I do make the “extra effort” to make pancakes

or waffles I make enough for an army and then forget

to invite them, so I can stock my freezer!

IMG_1403IMG_1402


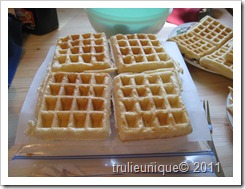
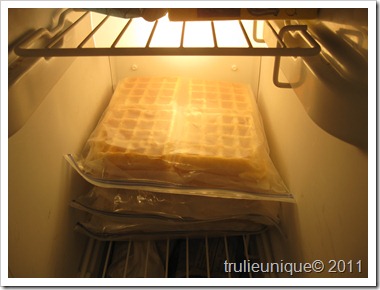
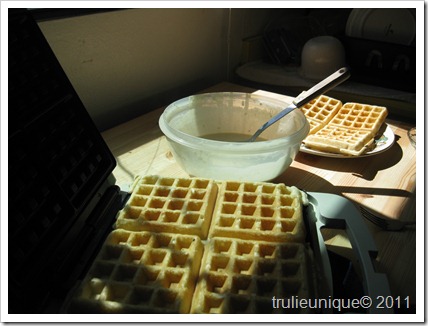
My waffle maker makes 4 giant waffles at a time and they

stack neatly in gallon sized freezer bags. I placed a sheet

of wax paper in between each layer to keep them from

sticking!

IMG_1404

Since these waffles are more dense and bigger

than the store-bought counterparts, you can eat one for

every two or three of the boxed variety.  This

is a FAR cheaper option especially since the boxed

versions have recently went up in cost by 25-50%!

waffles

Dress them up,

celebrate them however you choose!

Have them for breakfast, brunch, linner or dinner,

but make them at home and freeze them for

later! Your family will love you, your budget will

be greater!


Happy Waffle Day!


Linked up at: Women who do it all  *Tip Junkie  penny pinching

Best Blogger Tips Pin It

Monday, August 22, 2011

Popcorn Rocks Rock!

Playing with Rocks

My nephew found a really cool but simple

souvenir at the Northern Arizona Museum.

He was first attracted to the name “popcorn rock.”

popcorn rock, science and rocks, science experiment at home, simple science, rocks and science


I have to admit I too was very curious!

I was also attracted to the interactive/learning

 experience compared to your typical selection of

stuffed animals, magnets, and generic toys stamped

with a logo. We both went to the register eager to take

our prize home. (My thoughtful and frugal nephew

picked a package with two rocks! He got to take one

back to Phoenix and I kept one here with the promise

of pictures to compare our results.)

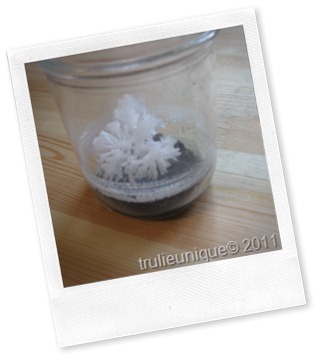
 IMG_1366

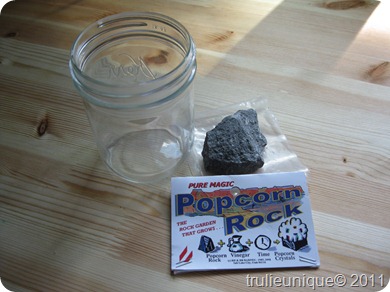
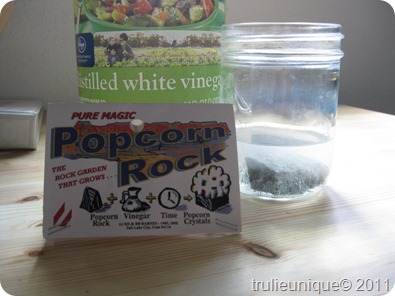
The instructions are simple. You place rock in a

solid container, poor enough plain vinegar to cover rock

and then wait. The crystals take about two weeks

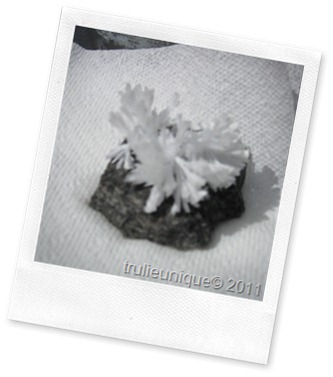
to begin to form but once they do the results

are impressive!

rock crystals, crystals, growing crystals, popcorn rock pop corn rock crystals

pop corn rocks


This was a fun learning experience for as little as $3.00!

I would have loved to bring this into my 4th grade classroom

for science, observation, writing, hypothesis and so much

more. You can research this rock easily on the internet

and you can find several websites to purchase it.

Thought I would share another cool find!

Learning can happen anywhere not just at

school!


LINKS: penny pinchers  Women who do it all  *Tip Junkie

Best Blogger Tips Pin It

Monday, August 15, 2011

Shutterfly's Photo Books and MORE!

Serious Scrappin’ With Shutterfly!

 I am a scrapper convert. Up until about a year ago

I placed my beloved family photos on beautiful paper,

embellished with all kinds of stickers, ribbons, rivets,

and more. A change occurred during one clarifying moment

as I was lugging my box of very heavy, but very treasured

scrapbooks. I realized that my children and posterity were not

going to want to pack, move,or store these very heavy, very

awkward boxes of scrapbooks. As my sadness of this

thought grew, an amazing realization hit me. Just like DVD’s

took over for VHS tapes; electronic scrapbooking is taking

over for the traditional three ring binder scrapbooks!

They are faster to put together,lighter, and more durable.

You can still journal your memories, preserve your photos

but  most important to me:

they take up about an 8th of the space!


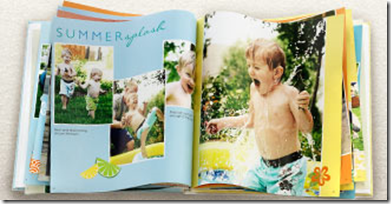
scrapbook example


Shutterfly not only offers a FREE online service to hold

and manage your pictures electronically, but you can create 

a professional and memorable album to be treasured for

many years to come. Shutterfly  offers a variety of themes

covers, backgrounds, and embellishments.

I love this very user-friendly site. My favorite feature is the

storyboard option where you can drop your pics into strips to

organize your photos by event. Then the system will automatically

provide the best layout options from your storyboards  and creates

your album! Once this is done the fun begins as you customize

by adding frames,stickers, and journaling.

What a time saver! Yet still personalized.


image

Not a big scrap-booker?

Shutterfly has something for you too!

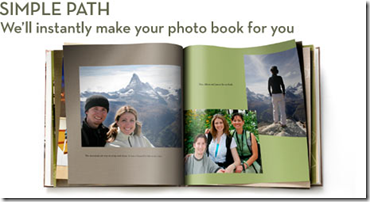
They offer a simple system for those who do not want

to have to customize in detail and simply want their

photos printed and organized. They call it the Simple

Path. You choose the photos and theme, and the

system does the rest of the work for you!


image


But wait there’s more!

Shutterfly offers more than just photobooks!

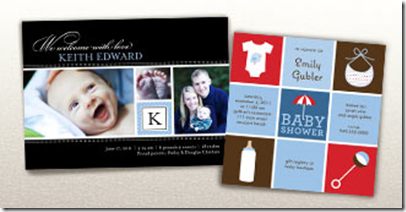
Did you know that Shutterfly offers customizable

babyshower announcements? They have all the latest

styles to meet anyone’s shower theme.


image


Not planning a party or shower?

That’s okay, Christmas is fast approaching and

we all know that getting those Christmas cards out

are an essential tradition for us to update family and friends

on our year. As we all know, time is precious during the busy

holiday season but,  Shutterfly makes it possible to do it all by

offering their customizable Christmas Cards. I am

already planning my cards for this year. I have chosen

a  trendy photo collage template that my family

will love to display in their homes all year long!


Shutterfly offers so many options to meet

all of  your stationary needs. From wedding invites to

thank you notes!

Which feature would you be most likely to use?

image


Share “Have your own blog?  Register for a chance for a free photo book from Shutterfly  http://goo.gl/K5hUC on your Facebook, Twitter, Google +, and other social media.


Best Blogger Tips Pin It